Welcome to Moda Fabrics!
Sunshine Mini Quilt
Sunshine Mini Quilt
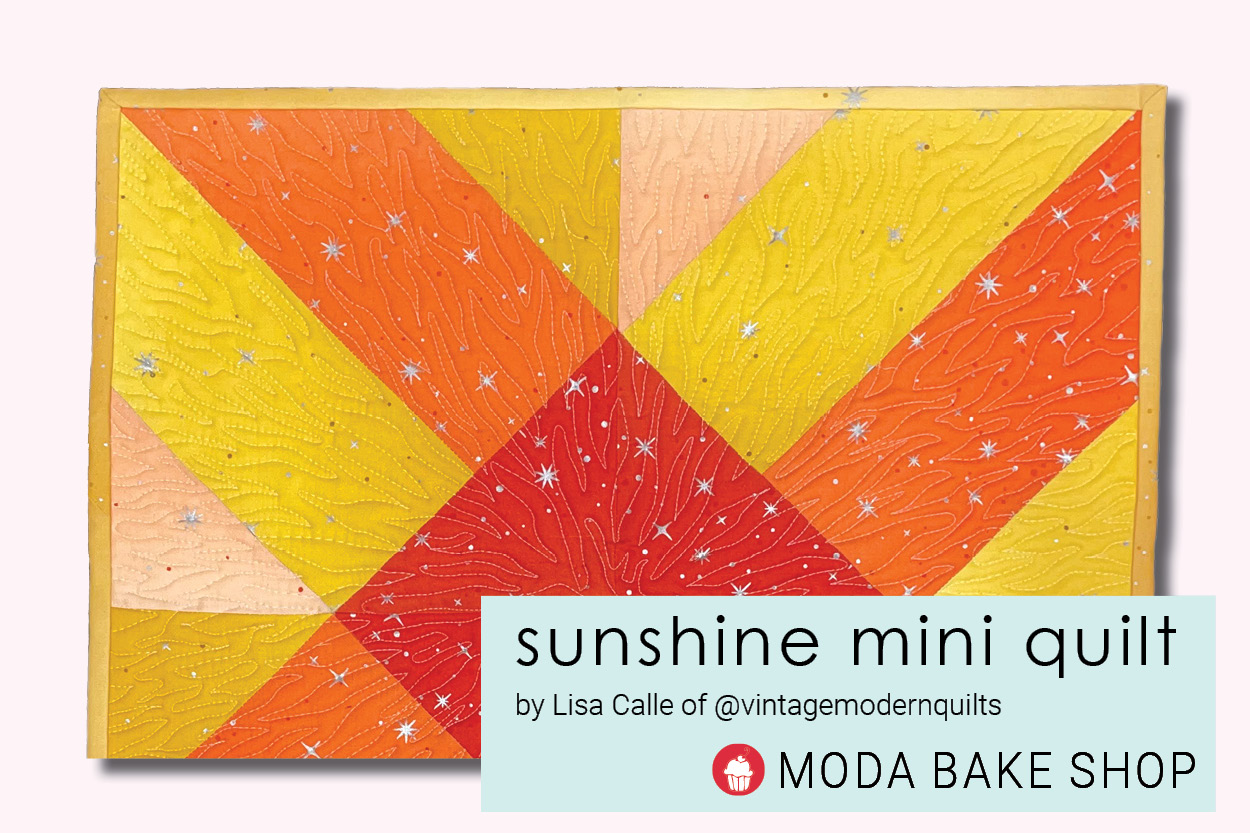
At first glance this mini quilt looks tricky to piece, but when you look closely you'll see it's made using all of the components you already know - half square triangles and easy corner triangles. Use half yards of V and Co. Ombre Fairy Dust or using fat quarters or even scraps from your stash. Leftover Layer Cakes are a perfect starting point for the Half Square Triangles.
YIELD
This mini quilt finishes at 18" square.
INGREDIENTS
2 half yards of Ombré Fairy Dust by V and Co.*
20” square of fabric for backing
(2) 20” squares of batting for backing*
(2) 2½” x WOF strips for binding
*An Ombre print has enough variation to create the multiple colors for this mini.
**Double batting makes the mini quilt nice and stiff for hanging on your wall
INSTRUCTIONS
CUTTING
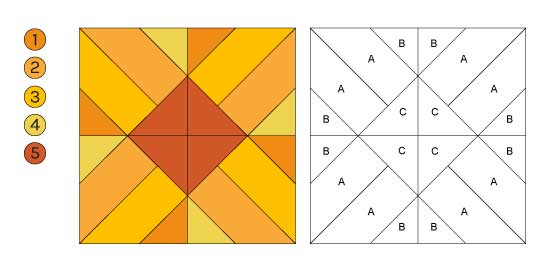
From Fabric 1, cut:
[A] (2) 10” squares
From Fabric 2, cut:
[A] (2) 10” squares
From Fabric 3, cut:
[B] (4) 4½” squares
From Fabric 4, cut:
[B] (4) 4½” squares
From Fabric 5, cut:
[C] (4) 5½ x” squares
STEP 1. MAKE HALF SQUARE TRIANGLES (HST)
Mark a diagonal pencil line on the wrong side of (1) 10” Fabric 1 square. Place right sides together with (1) 10” Fabric 2 square. Sew ¼” away from each side of the marked line. Cut apart on the line and press. Trim to 9½” square.
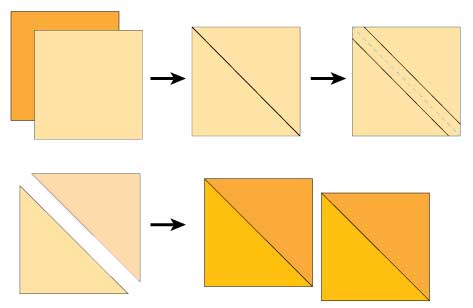
Repeat with remaining 10” squares to make a total of (4) 9½” Half Square Triangles.
STEP 2. MAKE EASY CORNER TRIANGLES (ECT)
Mark a diagonal pencil line on each 4½” square. Place one square on the corner of HST unit. Sew on the marked line. Cut ¼” away from the sewn line. Press towards the darker fabric.

Repeat with each HST unit.
Repeat to add ECTs to the opposite side of each HST unit.
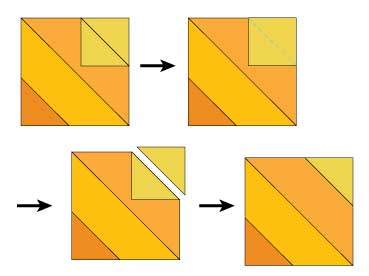
Repeat with each HST unit.
STEP 3. MAKE CENTER
Repeat to add ECT to create the center of the sun. Press well.
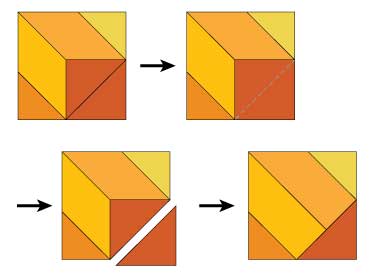
Repeat with each HST unit.
STEP 4. ASSEMBLE THE MINI QUILT
Join four HSTs to create the mini quilt as shown.
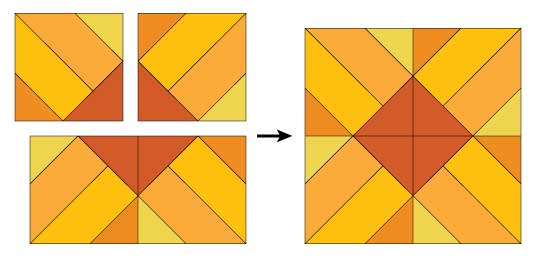
Baste, quilt and bind as desired.
Lisa Calle

Comments